In Daybook.Cloud, an item is a reusable record for a product or service. Creating items once helps your team use consistent names, codes, categories, and descriptions whenever they prepare invoices or record transactions.
For example, you can create product items such as Wireless Mouse, Computer and Accessories, or Office Stationery, and service items such as Software Development, Internet and Cloud Services, or Auditing and Tax Filing.
Before you start
Keep these details ready for each product or service:
- Name: The complete internal name, such as Wireless Mouse or Software Development.
- Display Name: The shorter name shown when the item is used, such as Mouse.
- Category: The product or service category that the item belongs to.
- Code: A unique, recognisable item code, such as WM-001.
- Barcode: Optional. Add the product barcode when one is available.
- Description: Optional internal notes that help your team identify or use the item.
Step 1: Open the Items page
Go to Trading and select Item from the left menu. The Items page shows the products and services already created for your company.
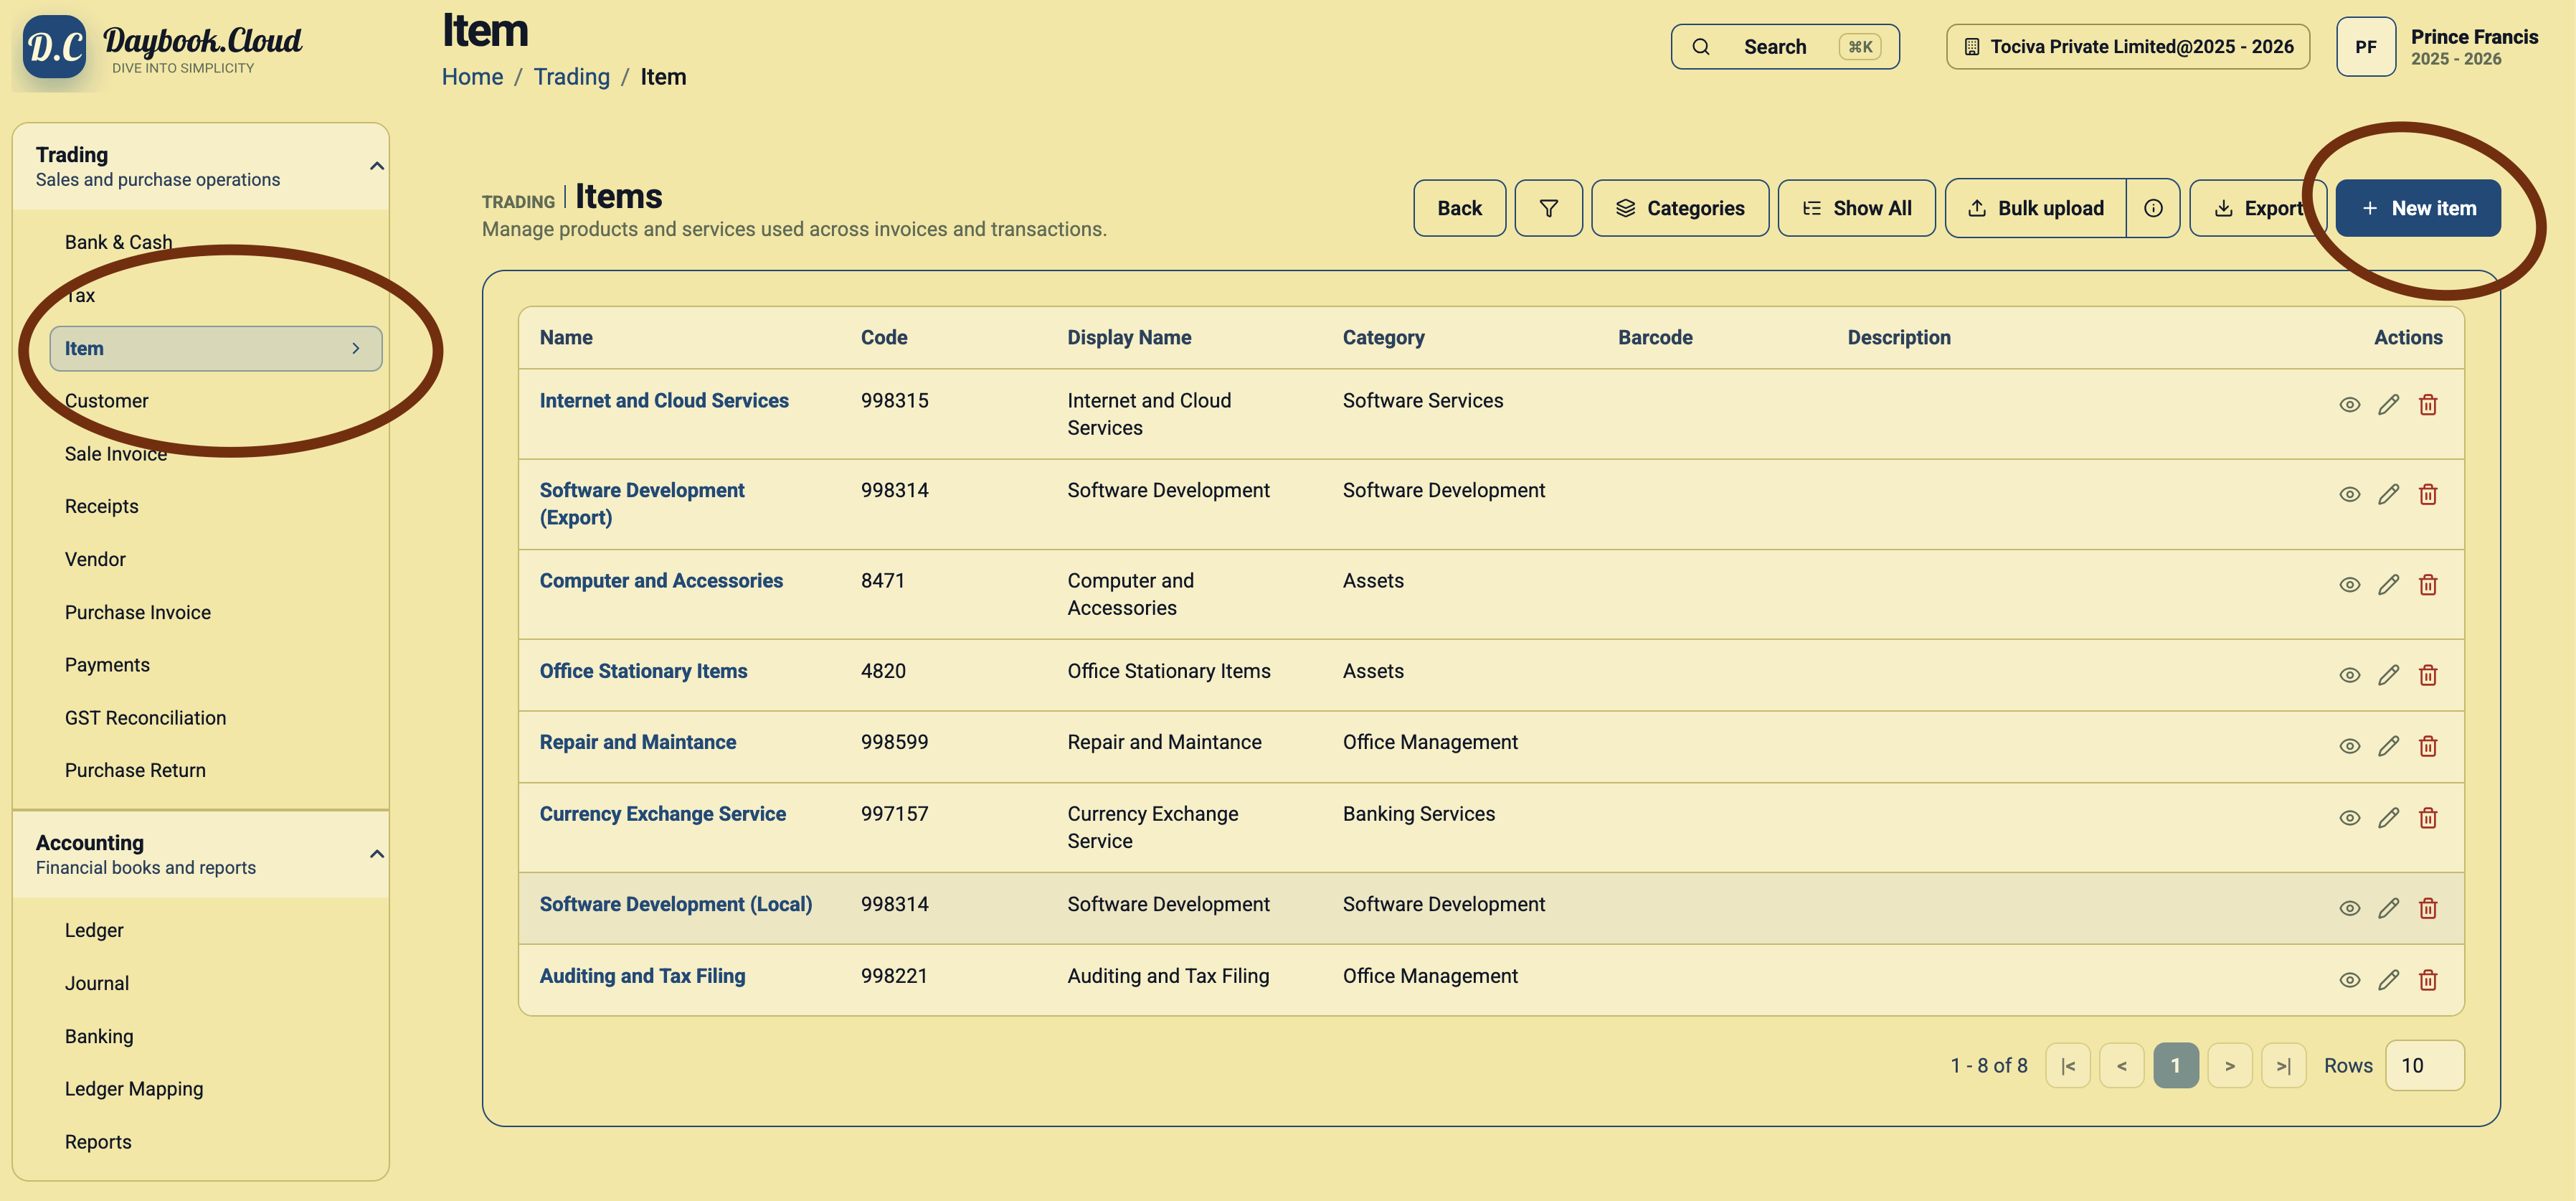
Step 2: Review existing items
Before adding another record, check the list for the same name, display name, code, or barcode. Avoiding duplicate items keeps invoice selection and reporting clear.
Step 3: Click New item
Click New item at the top right. Daybook.Cloud opens the Create Item form.
Step 4: Enter the item identity
Enter the Name, Display Name, and Code. Use a name that clearly identifies the product or service and a code that your team can recognise quickly.
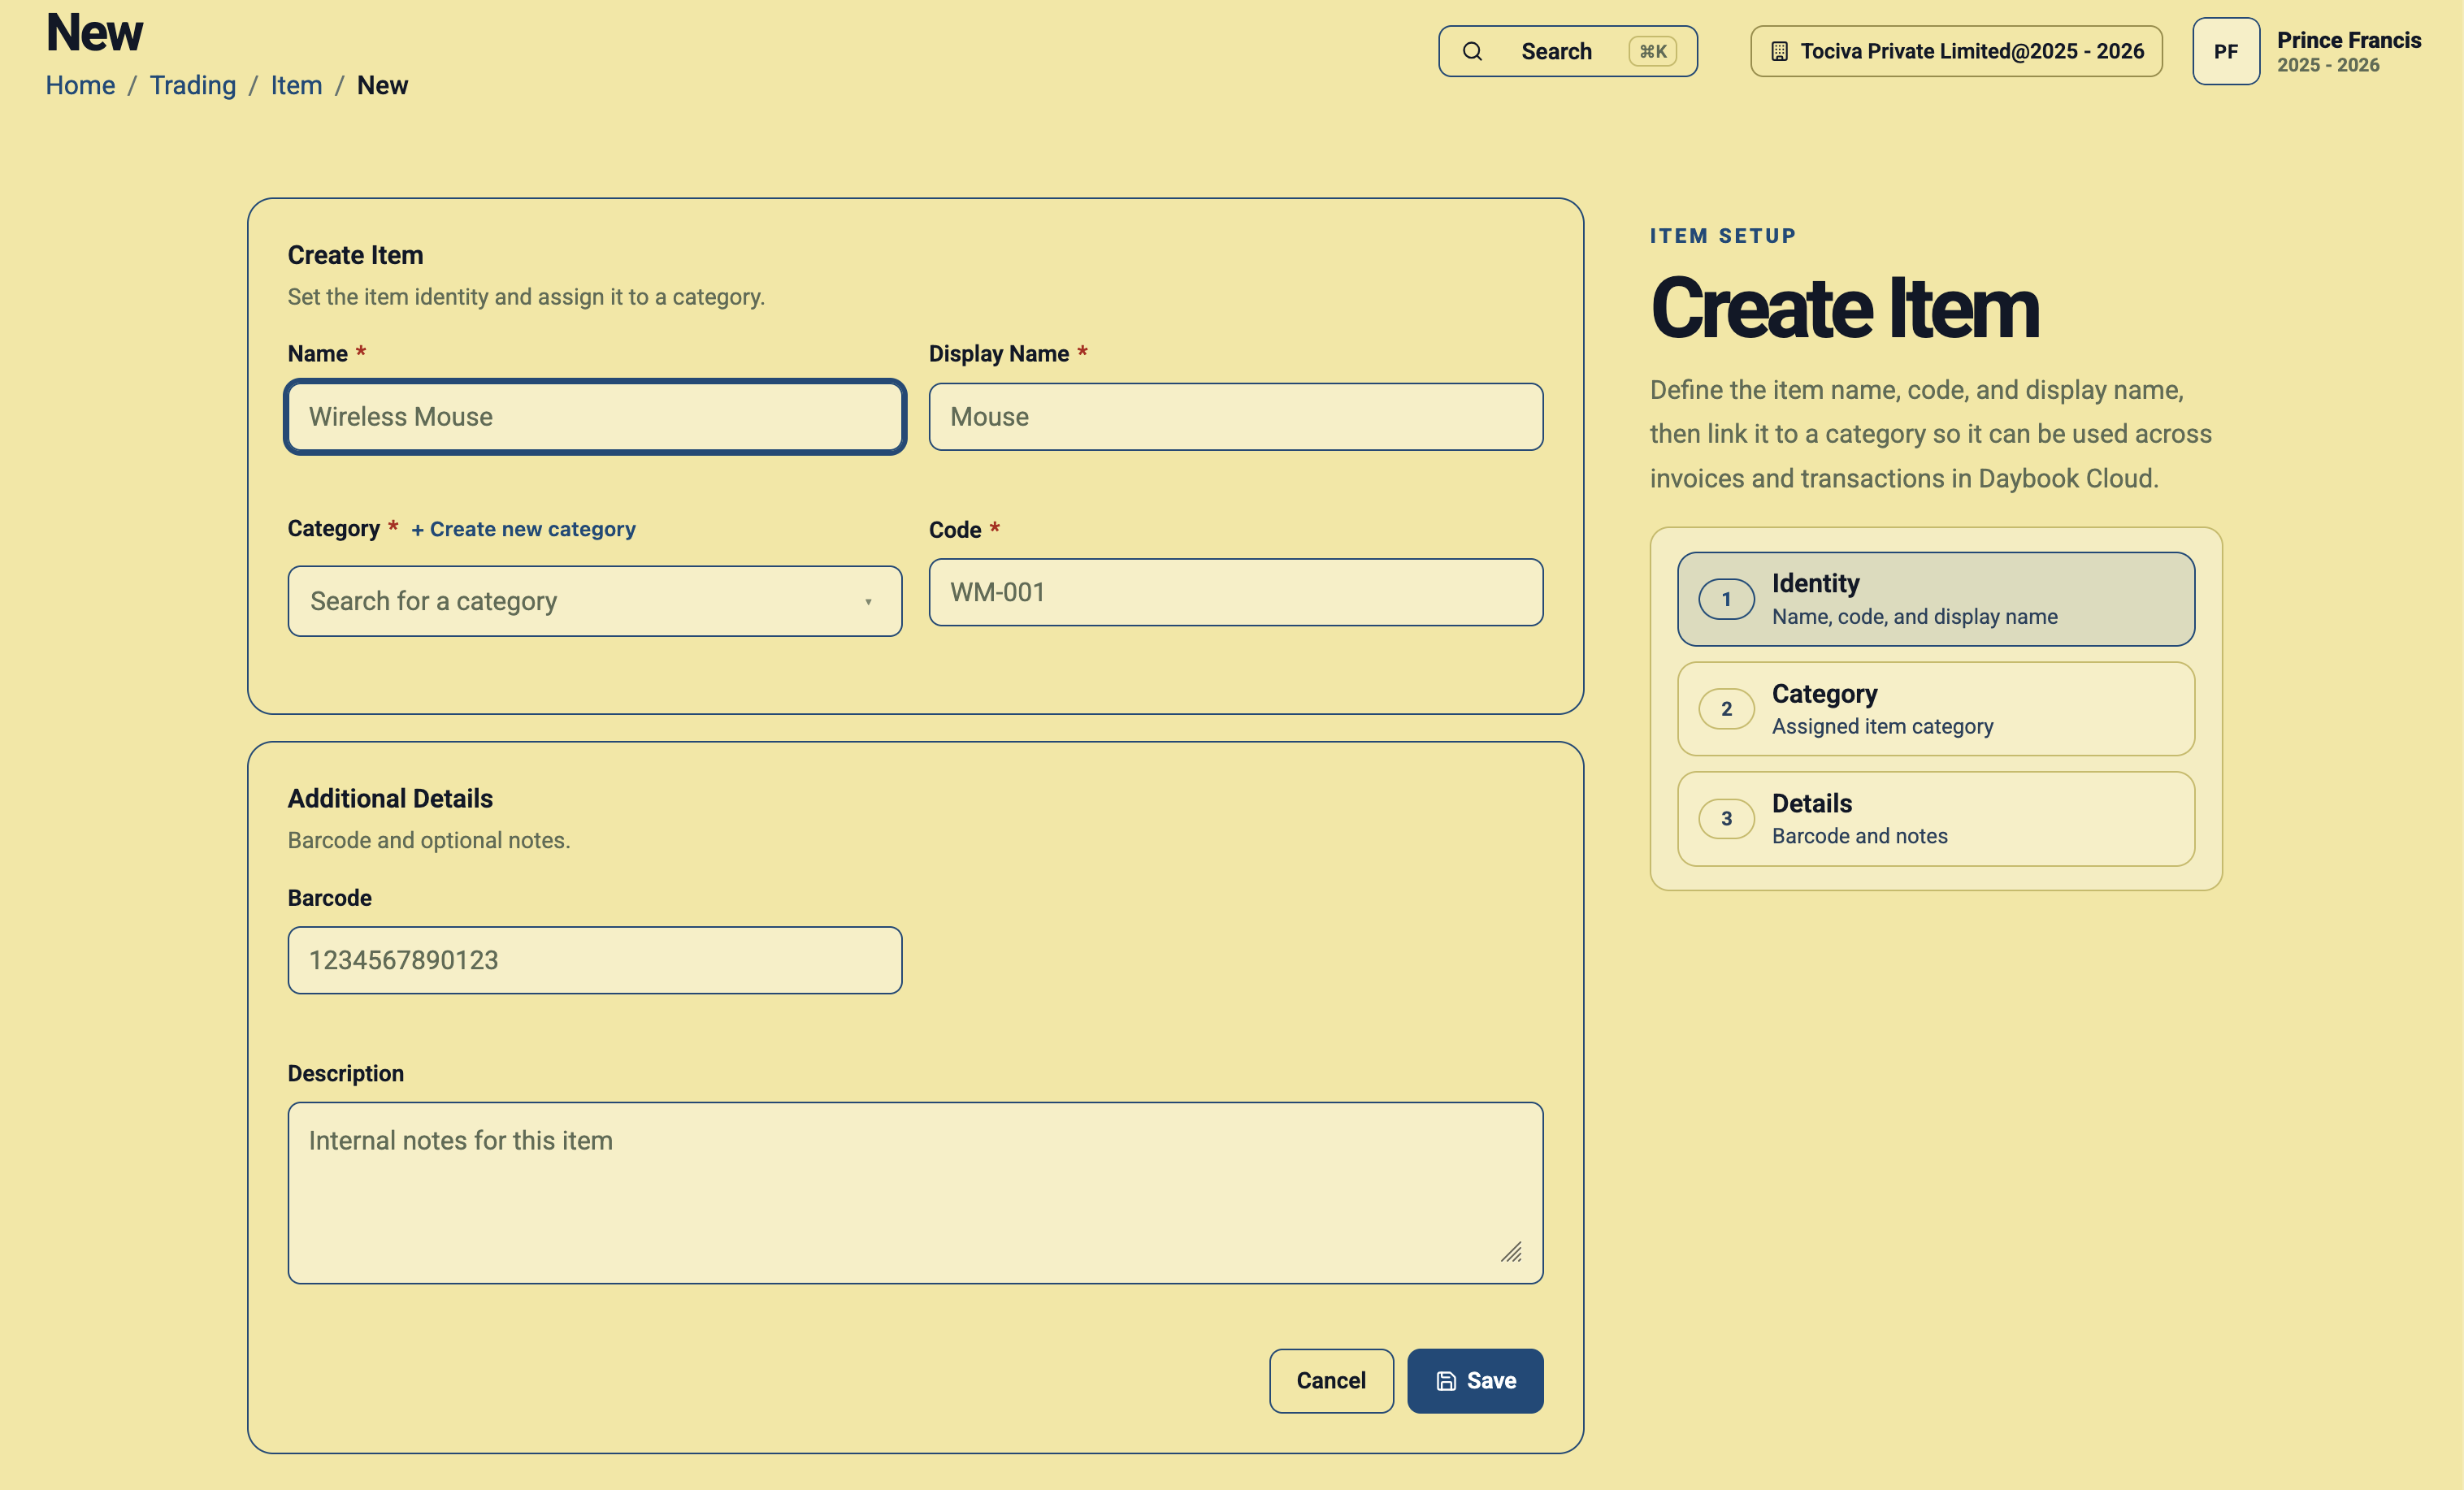
Example: Wireless Mouse
- Name: Wireless Mouse
- Display Name: Mouse
- Category: Select the relevant product category, such as Computer and Accessories.
- Code: WM-001
- Barcode: Enter the barcode printed on the product, if available.
- Description: Add useful internal details, such as the brand, model, or specification.
Example: Software Development
- Name: Software Development
- Display Name: Software Development
- Category: Select a service category, such as Software Development or Software Services.
- Code: SDEV-001
- Barcode: Leave blank when it does not apply.
- Description: Add a note describing the service when helpful.
Step 5: Select the right category
Choose the category that best matches the item. The category determines whether the item is organised as a product or service and can also carry the default tax setup configured for that category.
If the required category does not exist, click Create new category. You can also follow the item category guide before continuing.
Step 6: Add a barcode and description
Enter a barcode for physical products when you use one. Use the description for internal notes that make the item easier to identify. These fields are optional, so service items can be saved without a barcode.
Step 7: Save the item
Review the required fields, then click Save. The new item will appear in the Items list and can be selected in supported invoices and transactions.
Simple checklist
- Check the Items list before creating a duplicate.
- Use a clear name and a concise display name.
- Give every item a consistent, unique code.
- Select a product or service category that matches the item.
- Add barcodes only where they apply.
- Use descriptions for useful internal notes.
- Review all required fields before saving.